
What you will need:
- Drone
- Computer with Betaflight
- MicroUSB cable (to plug drone into computer)
- Radio Controller
- Charged Battery for testing
Step 1: Connect Drone to the computer/Betaflight using MicroUSB Cable
Step 2: Turn on Radio Controller
Step 3: Ensure the drone and radio have been bound together. If not, consult the Professional Development course on the lesson "Remote Control Binding". If bound together you should see a solid light on the receiver.
Step 4: Go to the receiver tab, select the 3 position switch you would like to use, and test it to ensure you see the appropriate box move. Test by going to the receiver tab, ensure the radio is on, and flip the 3 position switch back and forth. In this example the switch we chose is associated with Aux 2. As we move the switch we should see the Aux 2 bar move back and forth.
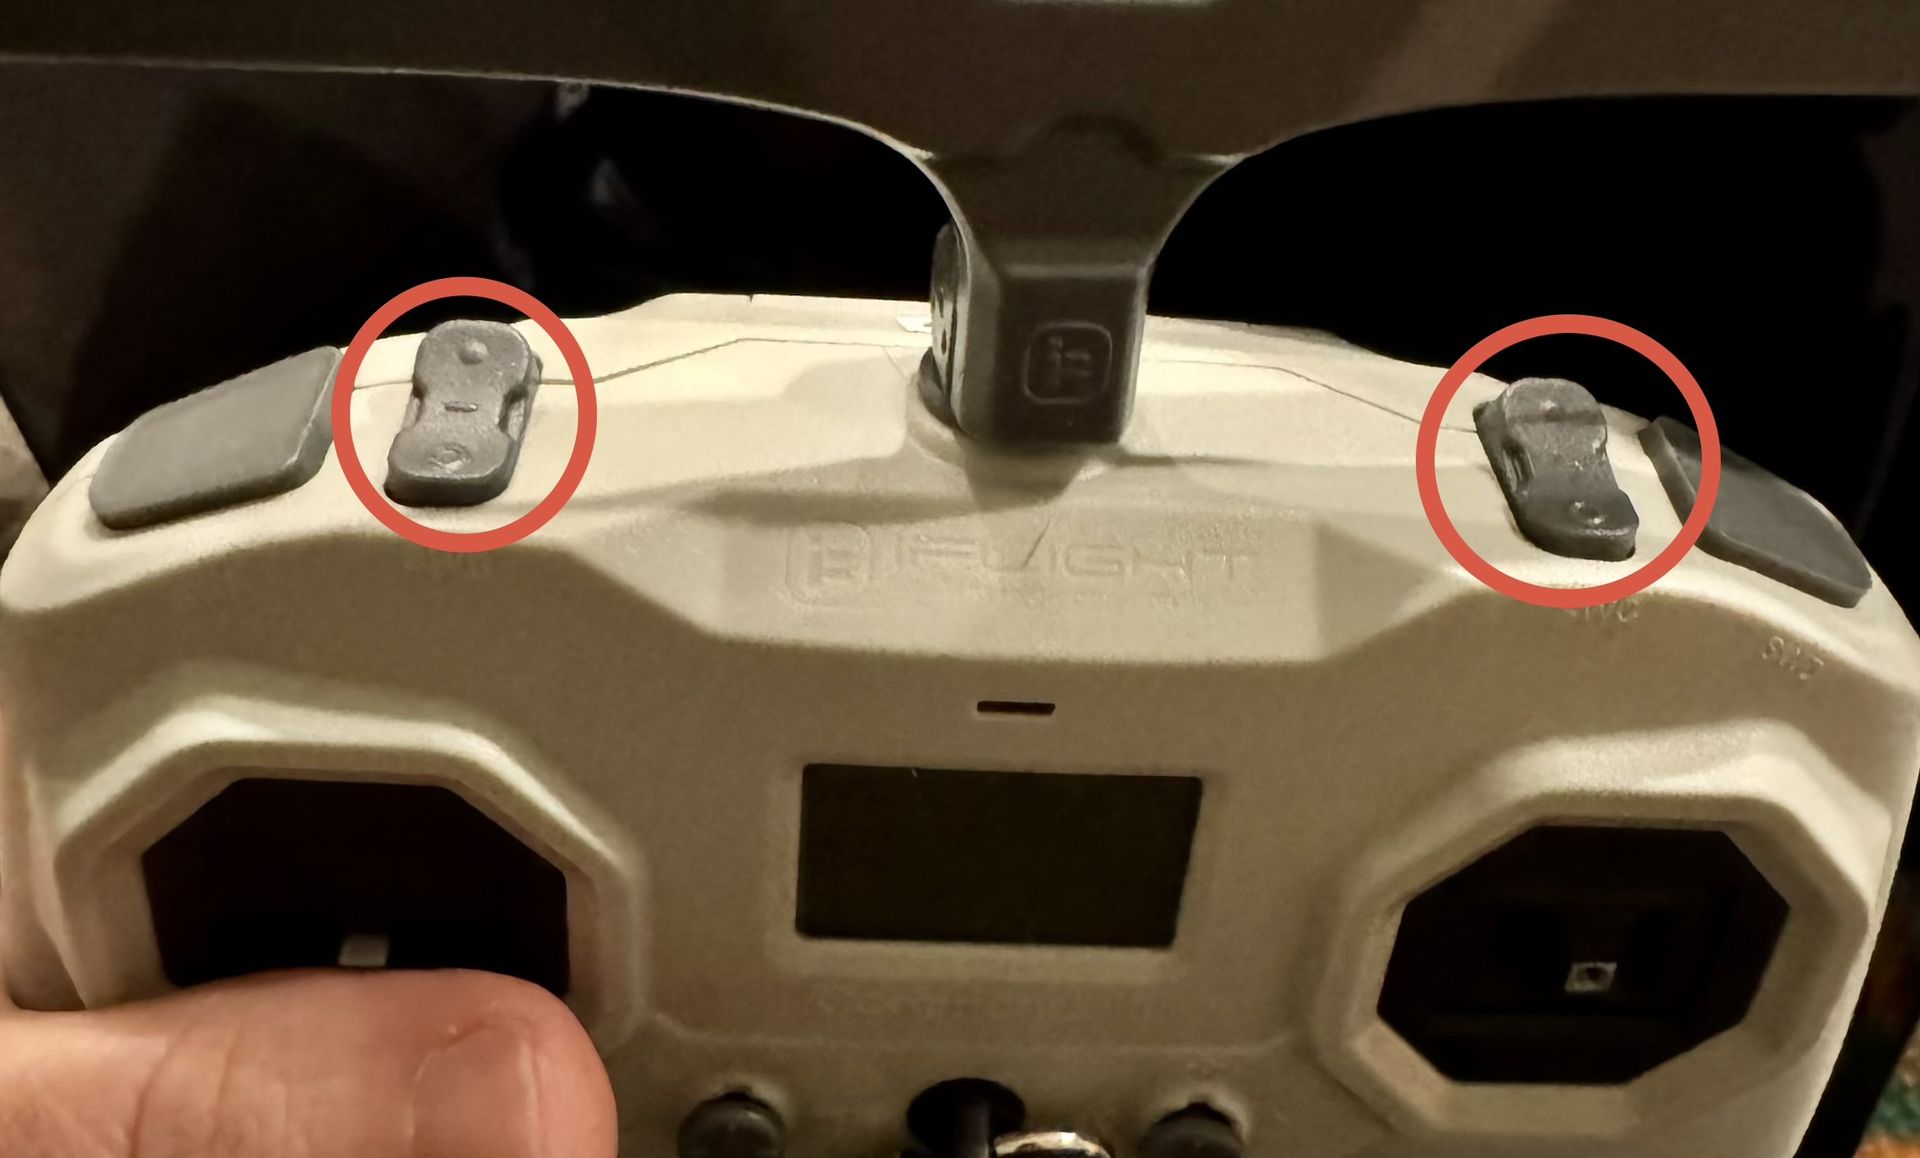
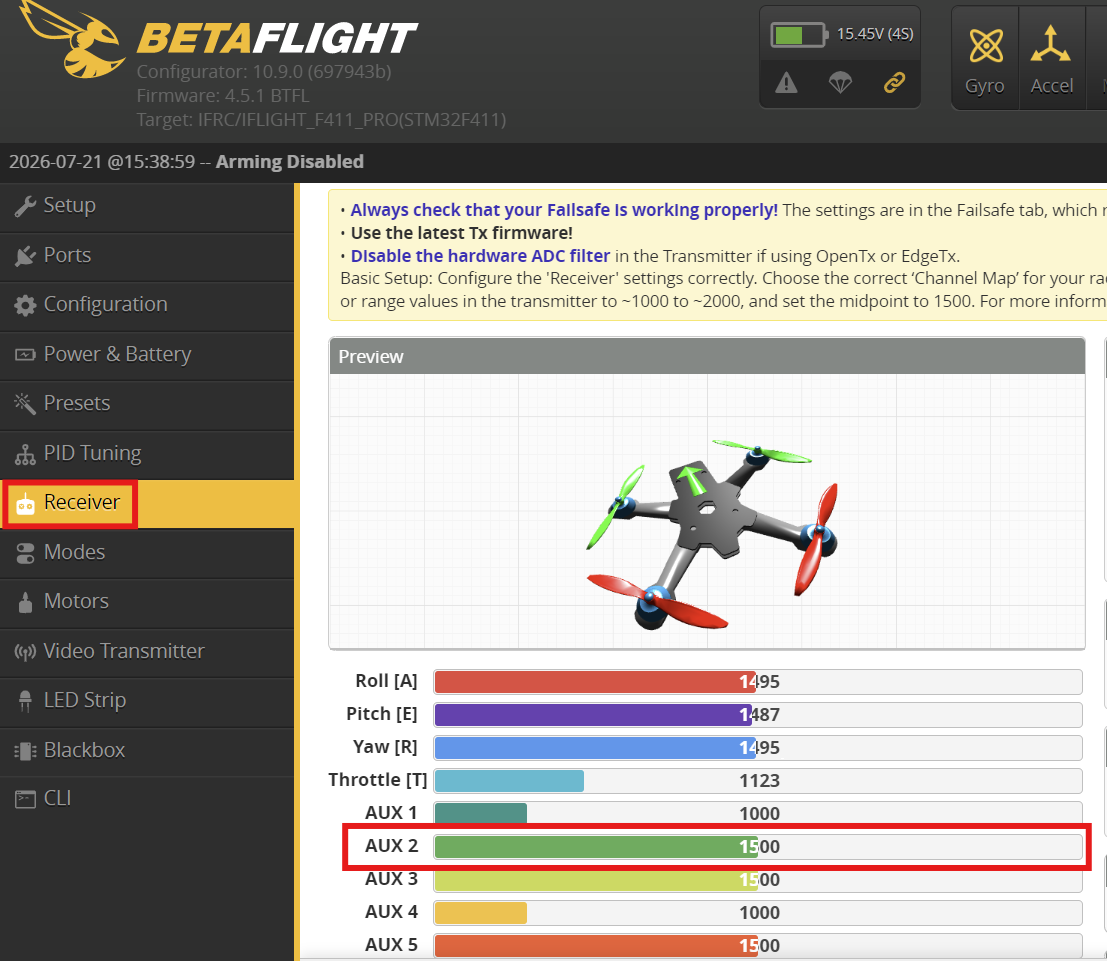
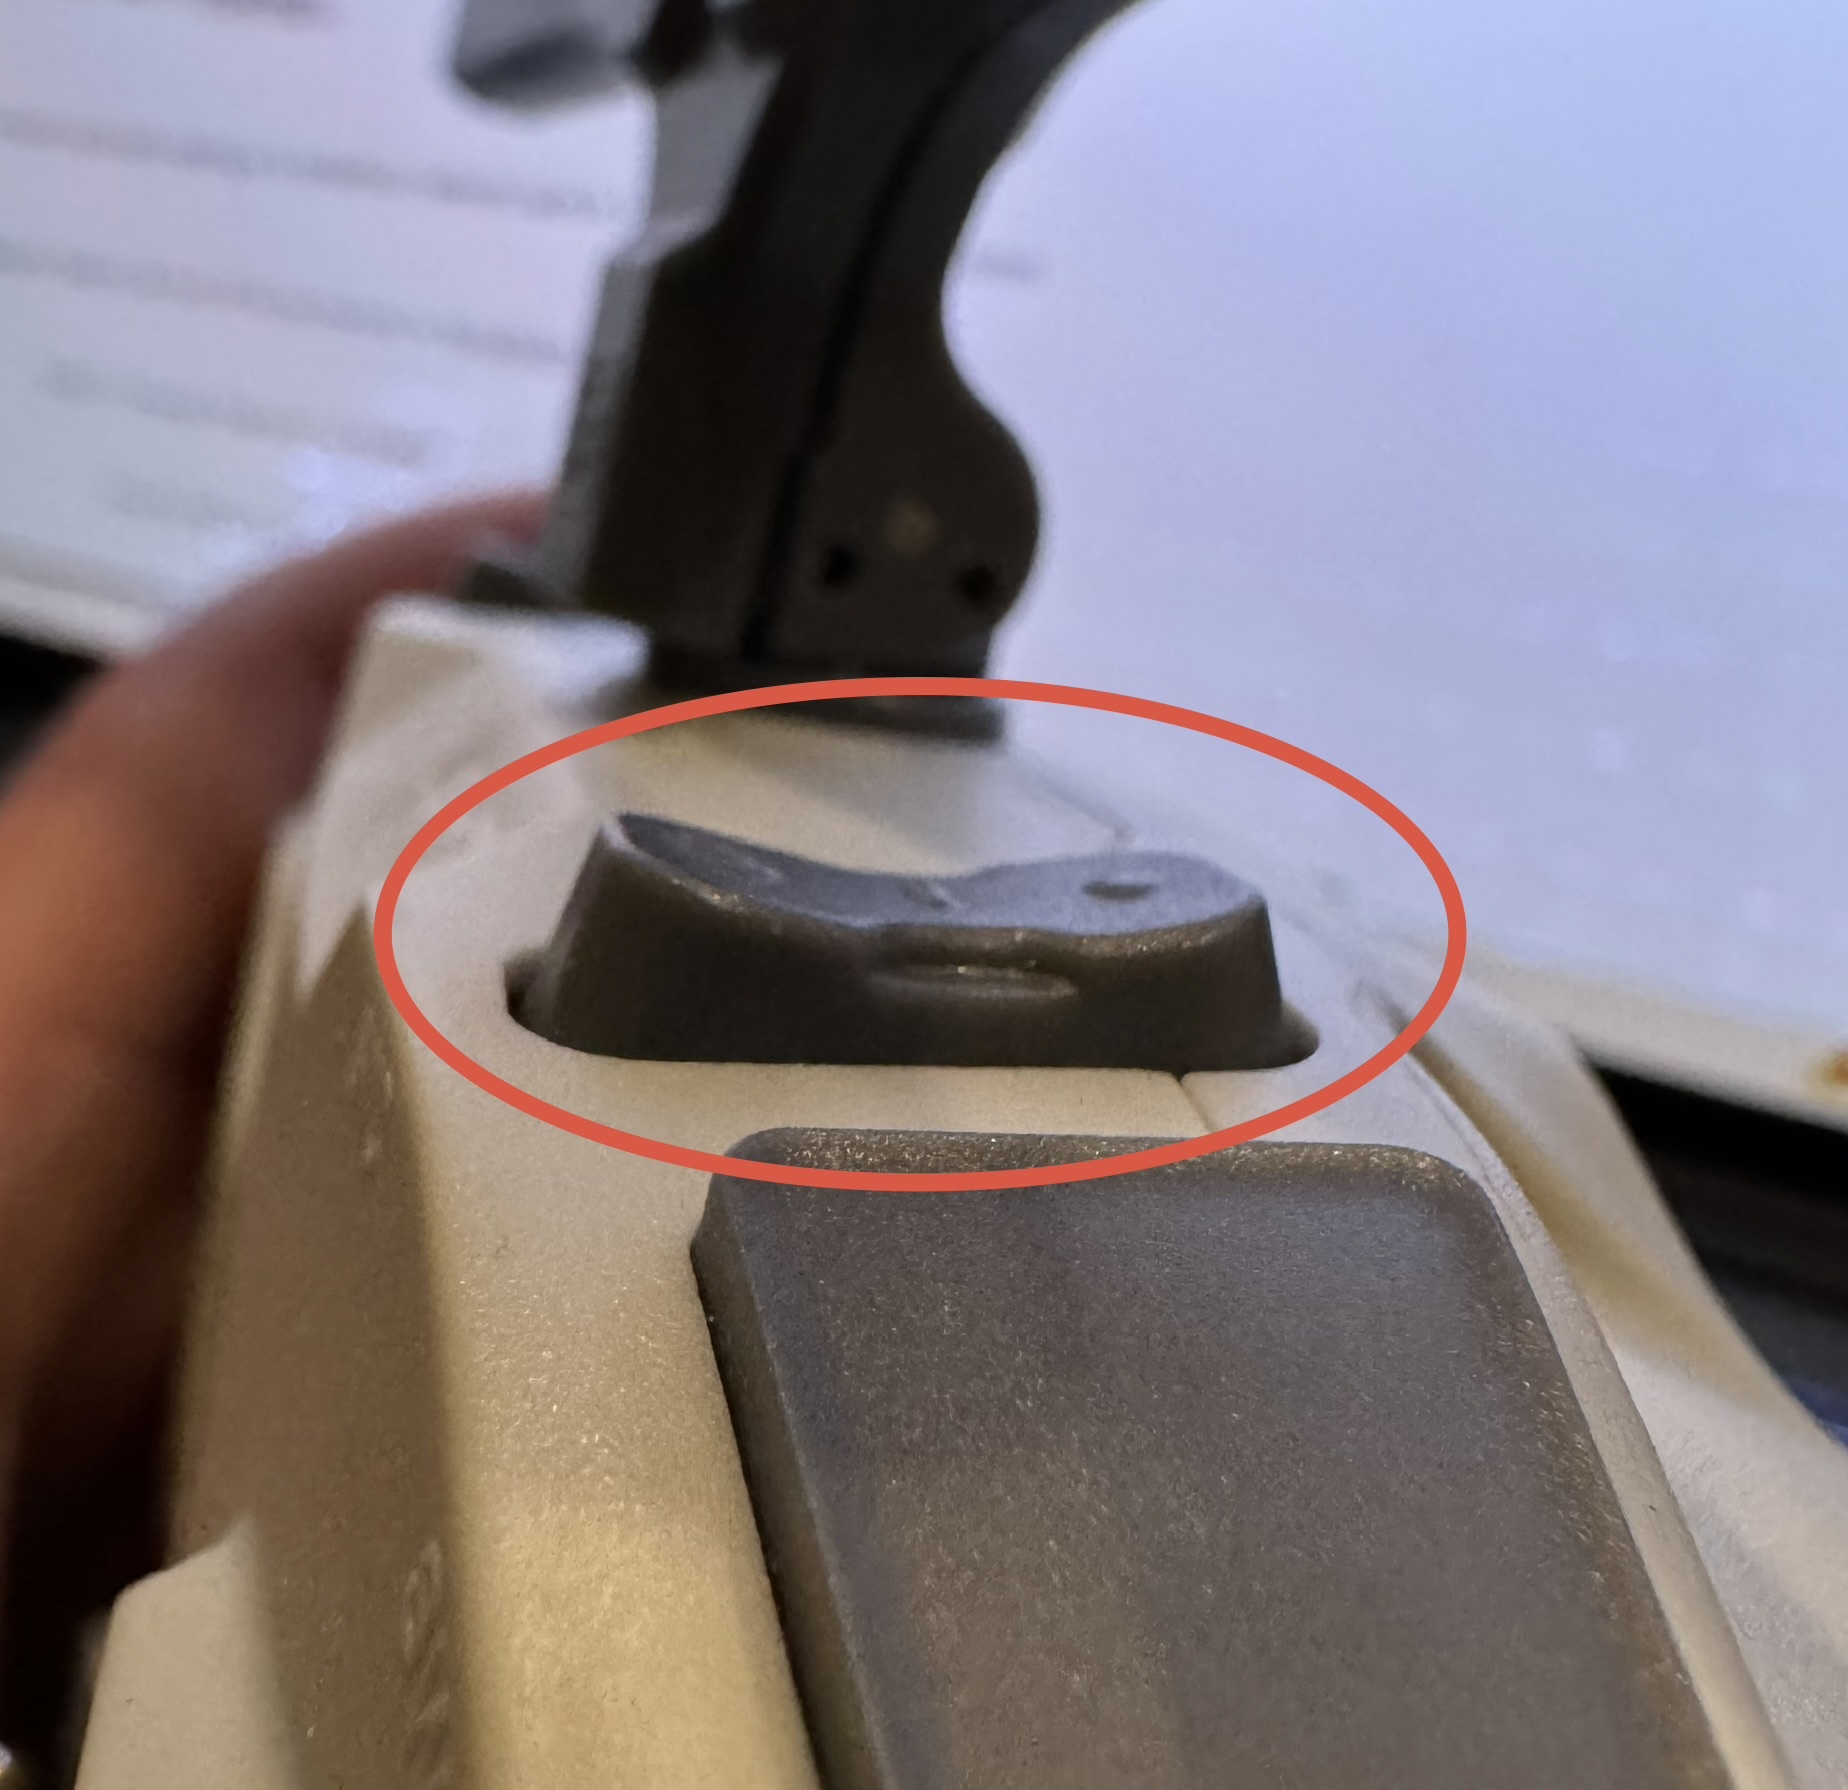
Step 5: Ensure you are using a 3 position switch and it is in the center position as shown. This is important so the drone understands the starting switch position.
Step 6: Navigate to the "LED" tab in Betaflight. It is located on the left hand side.
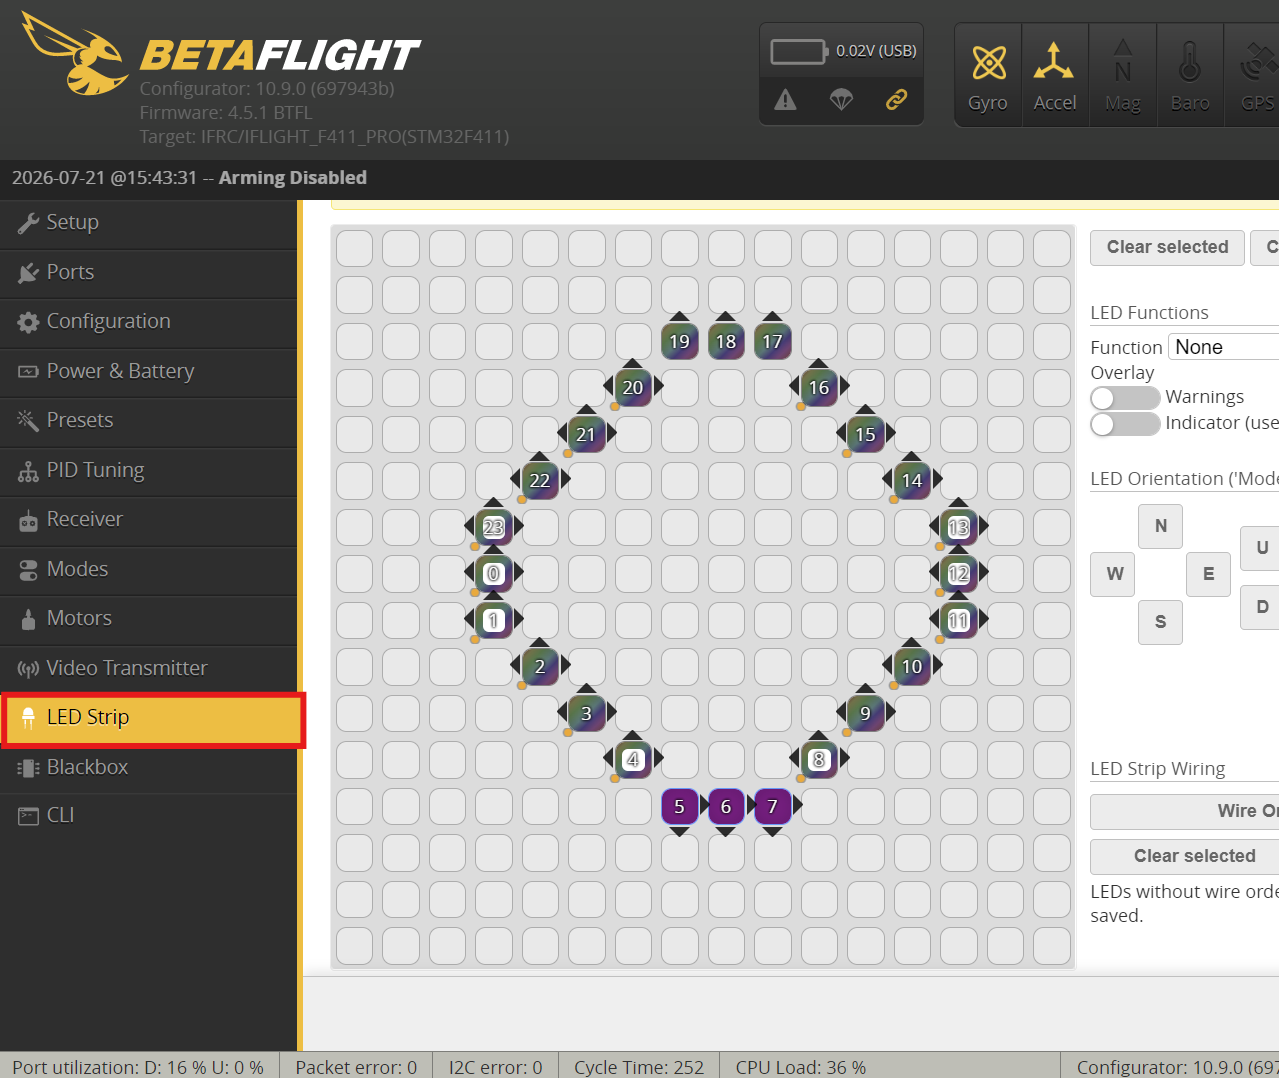
Step 7: Select all the LEDs as shown in Betaflight but skip the ones dedicated for battery and possibly the front LEDs if you prefer the front of your drone is marked by a different color.
Note: Depending on the drone, the back LEDs may not perfectly align with what is pictured. If this is the case and your battery indicator LEDs do not display correctly on the drone itself, you may need to experiment by selecting different LEDs in Betaflight until it is represented on the drone in real life as you want it to look. Remember to save each time so the change takes effect and then test with battery plugged and radio on.

Step 8: Change “Battery” to “Color”
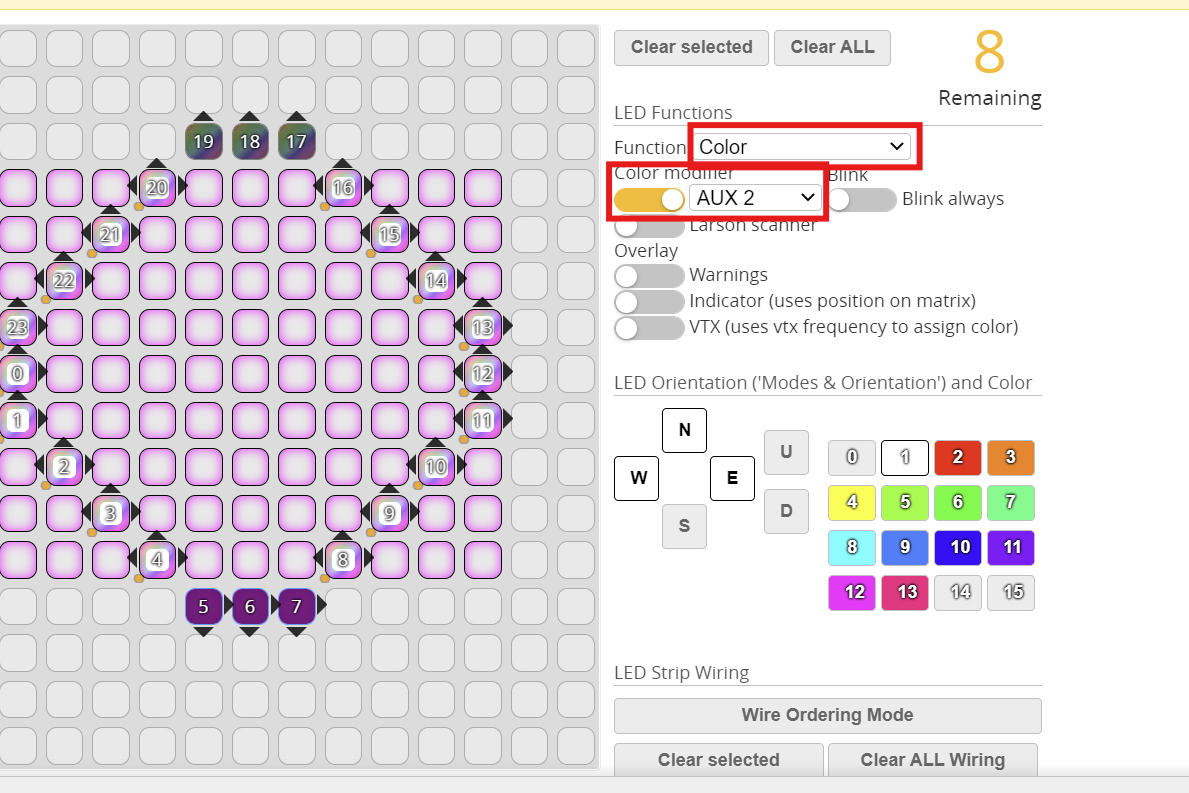
Step 9: Select Aux 2 for Commando 8 or the associated switch you chose in step 4.
Step 10: With all the LEDs selected to be attached to the switch, Select the “0” Color box and double left click the color block. The settings option box will pop up as shown below.
Step 11: Change to the values indicated below.

Step 12: Ensure all LEDS are still selected that you want to attach to the switch. Left click your mouse once on the white "1" box. This activates this color as the center of your 3 position switch.
Step 13: Click "Save" in the bottom right hand corner of Betaflight.
Step 14: turn on your radio and plug in a battery into the drone to test. Once bound, flip your 3 position switch and you will see the LED colors change Blue, Red, and White.
Bonus: Select “Larson Scanner” for extra Pizazz and to be the envy of all your friends. *Only do this if you are serious about Drone Soccer